First set of pictures show the valve top hat and hammer I lathed. The hammer is next to the original hammer
from the Airforce Condor.
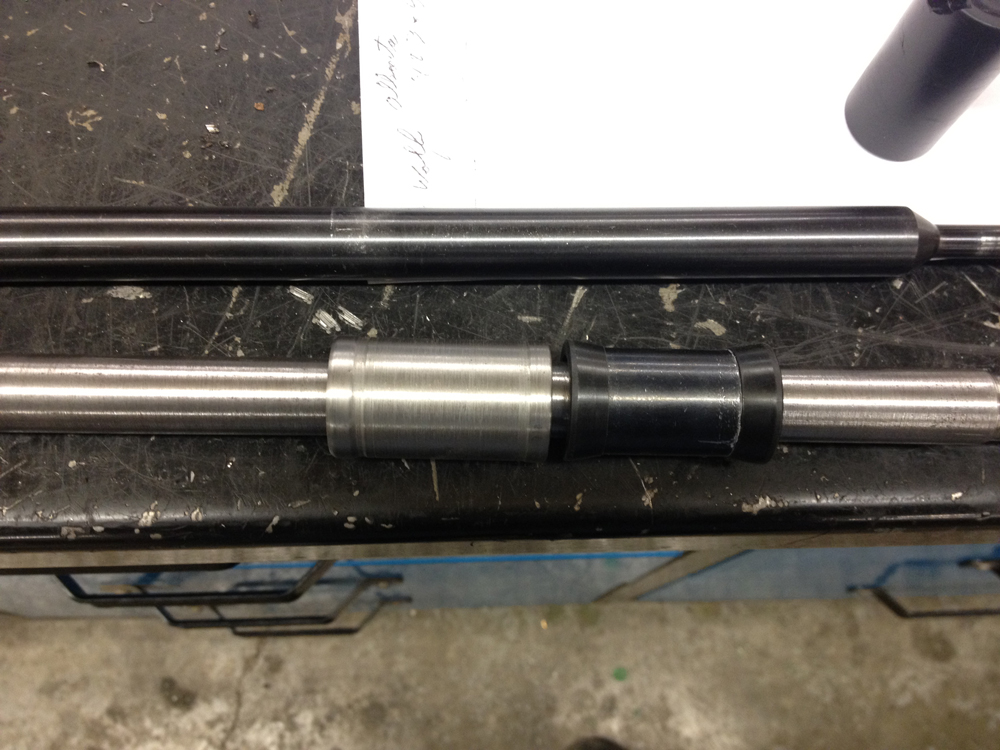
Here is the completed top hat, valve in a single piece construction. Lathed and milled a new breech from aluminum. The original
is made of plastic. I then did a test fit of the parts on the barrel. I had made a knob for the breech and later had to
take it off as the slot in the Condor body is 0.250". Ended up using only the socket head cap screw as
the knob as it was 1/4". Need to make something better for cocking and have some ideas.
A few more pictures of the assembled parts. Next step was to assemble the Condor. I noticed immediately that the barrel wouldn't
center itself in the body. When set screws were tightened the barrel pushed to one side. This created a problem when the breech was
installed as I had made it 1.00", leaving very little for clearance. This would have been fine if the barrel was perfectly center.
I couldn't cock the rifle well as the breech was tight in the body diameter. Thinking I had to rework the parts I made, then
remembered something we did at work to adjust the diameter of rolls on a roll former. We used electrical tape to build up the diameter
of the shafts when testing the over bending of some areas on sheet metal as it rolls through the machine. That evening
taking some clear tape, I made about 2 loops around each aluminum barrel collar. Put tape on the barrel at the fore end as well
to keep the barrel as centered as possible.
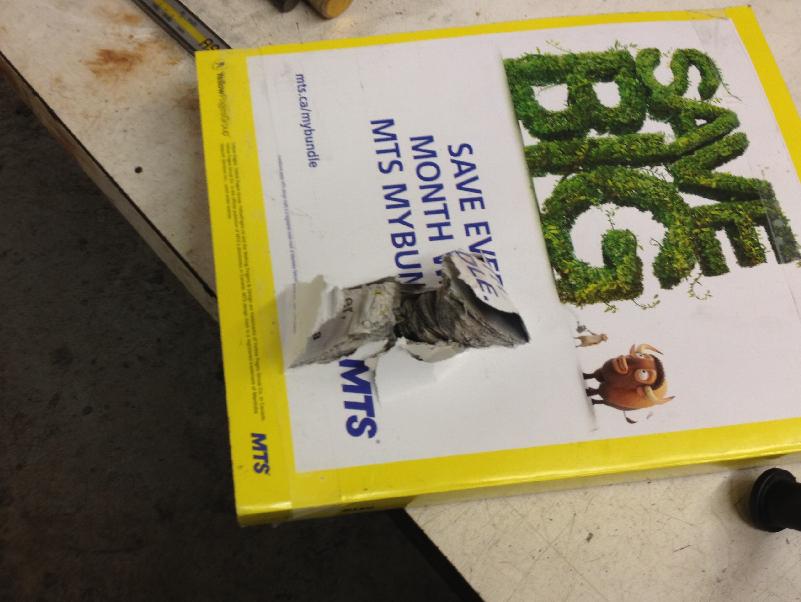
The last picture above shows the lead ball loaded and then I shot into an old catalog I had laying around. The hole in the center
is the hole the lead ball made and it travel almost 3/4" into the catalog. The weight of the lead balls are 92.9 (93) grains. The
airgun was so load I dared not do another shot.
First picture is the retrieved ball and a lead ball out of the box. December 6, I went to my dad's shop. Second picture is
the barrel which I took out for sanding. The breech has an o-ring in it that slides on the barrel. The breech didn't slide
well so using 220, 320 and 440 sandpaper got the barrel end very smooth. I have read on some forums some polish their barrels
to a mirror for their Condors. Setting up the breech in the lathe, took off 0.050" on the diameter and proceeded to assemble
the rifle.
Having assembled the air rifle with the modified components I had to pump up the air tank. Having test fired at home
a few nights earlier, I had to pump up the air tank back to 3000 PSI. Takes awhile with an airgun hand pump! Set up
a target using a phone book at about 25 to 30 feet. Wanted it to be close enough that if I missed the lead shot wouldn't
do any damage. You can see that I hit the lower left target.
This phone book didn't seem to tough for the lead ball to plow through! I was assuming that the ball would not go through
at all based on the test I had done at home on the catalog. But clearly the lead ball passed right through. Ended up placing
two 1/2" thick plates behind the target as even the drum that supported the phone book had a visible dent. I place a 2 X 4 against
the target. After I pulled the trigger I saw the would splinter! The second picture shows the entry and where the ball stopped.
It almost passed through the lumber at 1 1/4".
Due to the leads balls being 40 CAL I had to push them through a sizing die with a hand held press. You can see a ring
around each lead ball and they are sized to .387". Once again I filled the air tank with air using the hand pump to 3000 PSI. Really
need to get my scuba tank filled! Loaded the breech with a ball which fits nicely, much better then with the test rifle I
had built fours years prior. Placing the target out at 45 feet I took two quick shoots and placed them at 5/8" center to center. Not
the greatest but didn't take the time to have a good table to rest the airgun on.
Today is December 8 and I had wanted to go out and take a few shoots but got almost 2" of snow. Been fighting a flu bug all
week as well so will delay any more testing for now. Next step will be to chrony the shots starting with 3000 to 3100 PSI
fill. The two shoots I took on the previous pictures ended up leaving the air tank with around 2300 PSI. Big bore uses a
lot of air and will have to work on keeping my scuba tank full or buying a nitrogen tank with regulator. Post more in the coming
weeks when I can do some 50 to 75 yards shots. Judging by the two shots at 45 feet, if I take the time to setup on a bench
placing shots more accurately might be feasible. The homemade barrel is more accurate then I thought originally but a good
test rifle would have assisted with that in earlier trials.
Thanks for reading!
Questions or comments about this page feel free to send an email.