Airforce Airgun Website
Condor - Great Rifle Design - December 6, 2012
When I got back into airguns a few years ago I saw the Airforce Condor in many forum topics. At the time
it was a little to much money to invest in an air rifle, but it definitely is worth it. After 3 years of delay
I finally found a Condor for sale. I bought a used Condor, Model R0401, and received a good scope, hand air pump,
two air cylinders, and .177 & .22 barrels. It was good deal at the time as I paid a little more than the price
of what a new rifle would have been.
This past summer I shot the Airforce Condor a lot more than the previous year. The power and accuracy makes the rifle
enjoyable to shoot. Last winter my attention turned to big bore air rifles once again. Having to delay the build of any
large bore rifles for awhile, the idea of using the basic airforce design has been on the back-burner. Due to spring and
summer approaching I didn't want to dismantle the rifle to create drawings. But finally this winter I decided
to dismantle the Condor and create a CAD version of it. This will assist me in designing a 50 CAL rifle that I have
been toying with in my mind for years.
Recently taking a few evenings, I disassembled the entire rifle and proceeded to create hand drawings which I then used to
create CAD drawings in Solidworks. Didn't worry about being perfectly accurate on the body as I cannot use it for any
builds as it is a one piece aluminum extrusion. However, most measurements are within .020" (+/_) on the body and .002" (+/_) on internal parts.
When things are reverse engineered a person tends to learn what processes
were involved in the production of the item. For instance, the main body is extruded aluminum. This saves a lot of machining
time and allows for a cleaner look. From there the scope mount areas and trigger holes are machined. I can see many mill cutter marks on
the openings and "chatter" marks. One area by the scope mount is over cut as the cutter took a "bite" into the aluminum.
I would have thought the manufacturer would have paid more attention to ensuring smooth milled faces which in aluminum are easily attained.
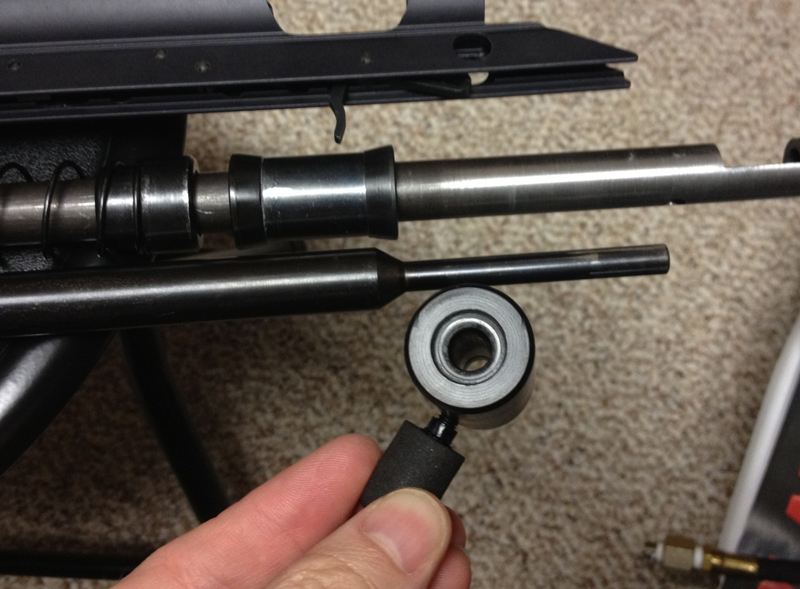
A few things I discovered along with manufacturing are the tolerances used in assembly. The barrel rests on two aluminum
collars held in place by set screws. The body of the rifle has four set screws to hold the barrel unit in place, pushing
it up and to the side. The tolerances are fairly large, diameter of body being 1.008", and the barrel collars 1.000". The front
plastic collar that covers the body and slips over the barrel has not function other than providing a cover for the body. The
hole diameter is much larger than the barrel diameter.
The trigger mechanisms on my Condor are all made from steel which have been wire EDMed (electrical discharged machining). Many
years ago I ran a EDM machine and the design was obvious for that time of machining. EDMing saves a large amount of manufacturing
time as many sheets can be place on top of each other. Another benefit is that the steel can be heat treated before hand
and the wire cuts the material the same as if it was soft. Thickness part I ever cut was 9.5" and it took days to cut!
Condor Modifications
As I was created the CAD drawings it dawned on me that one of the barrels I created four years ago would actually fit
right into the Condor. The barrel collars, the power adjustment, the hammer all fit over the DOM pipe I used. The factory
Walther barrels are 16mm or 0.630". The DOM pipe was .627", only .003" difference! To see the barrel visit
Rifling Page 2. Now I am delayed once again from building a big bore rifle as I want
to first try to make the Condor able shoot with the barrel I made. Not sure how it will pan out, have to make a breech
with a 9/16 internal diameter and a top-hat that will be 9/16 as well to seal the breech. May have to make a heavier hammer
as well and change out the spring. When I purchased the Condor I received a high flow tank as well. I think the larger
valve opening might be enough to fire a slug but will have to wait and see the results.
Almost fours years ago I had tried another idea, lathing lead to form pellets or bullets for the .385 CAL barrel I made.
Visit this page to see Test Rifle Page 2. Realizing now what may
have been one of the mistakes in the experiment, lathing the waist to thin. I think this caused the weight to shift easily
when bullet spins leaving the rifle. Also the barrel wasn't well supported and could have added to the large groupings. Plan
is now to create a new mold based on the MAXI BALL design with a hollow point to add drag.
NOTE: I am NOT offering any CAD designs of the Airforce Condor for sale at anytime.
Below are some preliminary pictures of the barrel and Condor. I had wanted to start on this project today, but
have had the flu for the better of a week so decided to rest and work on my website.
CAD Renderings
 |
 |
 |